Culture & Belonging:
Capturing Stories: Shooting interviews

Shooting interviews
Framing
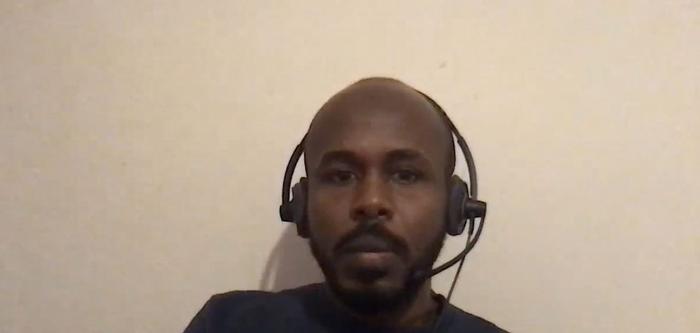
The goal of your interview filming is to foreground your contributor in the location. This is the first and last thing most viewers will notice.
Think about what a still image of your interview would tell you about its content.Formal or informal? Impressive or intimate? Professional or Personal? Does the subject feel like they belong in this space?
Tight, Medium or Wide?
Framing your subject effectively can help tell your story.There is no strict rule for the “right” frame, but there are general rules for “correct” framing you can bear in mind.
- A tight frame feels close to the subject— this will feel intimate and personal, but possibly intrusive. You may also lose body language and background. If you have a second camera angle, a tight frame can be really useful.
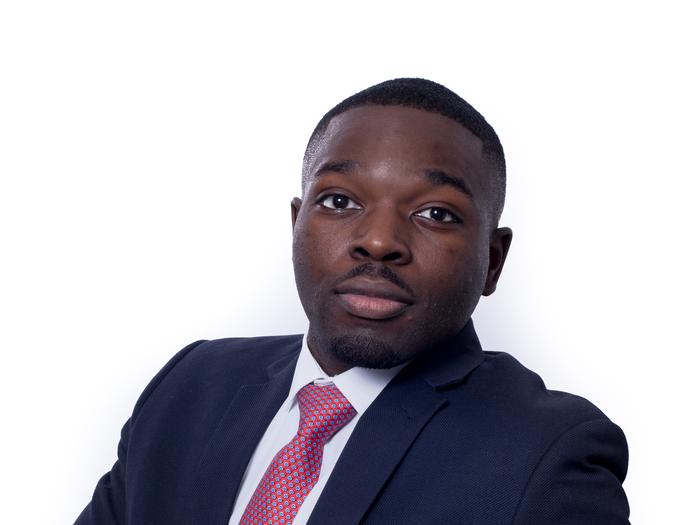
- A wide frame gives a fuller view of a subject, but can make them feel remote. A strong personality or VIP may be able to “own” a wide frame, especially if placed in an interesting background.
- A medium frame is generally best for professional interviews— framing to accommodate the waist and shoulders, with enough background in view to give the interview some context.
- If in doubt, go a little wider. A video editor will be able to “punch in” a wider frame to create a tight alternative; this will help edit around pauses or errors.
Safe frames:
- Ensure your interviewee’s head and body is placed within the frame, so that any natural shifts or movement don’t result in body parts moving out of view.
- The priority is giving your subject headroom— a small amount of space between the top of the head and top of frame.
- If the subject is too close to the top of frame, they will at best, appear cramped, and worst, you risk losing the top of their head as they speak.
- If you can, consider whether your subject uses their hands to gesticulate. It is generally better to either see the hands fully, or not see them— it is distracting to have hands that “float” in and out of frame.
Rule of Thirds:
- Following the rule of thirds is the best method for capturing clean, consistent interviews. This is a strong frame with plenty of safety room for natural movement, that can be consistently repeated.
- Most cameras will have a grid view in their display settings. You can use this to guide your framing.
Angle of view:
- Position your interviewer across the frame from the interviewee. When the interviewee speaks to the interviewer, they will face the opposite side of the frame. This creates a natural feeling of conversation.
- We describe this as Left -> Right and Right -> Left framing, or L->R and R->L .
- If you have more than one contributor, try to arrange a balanced number of L->R and R->L interviews. You can do this by switching the positions of the camera and interviewer.
- Bear in mind that your lighting and background will shift with the camera movement: make sure both positions are well lit and have an appropriate background.
Lighting
- In an ideal world, you want your interviewee to be the best lit object in the frame. However, regardless of equipment or location, the key is separation- your interviewee should stand out from their background. This can be done by lighting your subject, or framing them against a background that gives them a clean outline. A window or single-coloured wall is usually the best bet.
- A light on the face provides fill- consistent light on the face that won’t change with the weather. It can also provide an “eye light” that will make your interviewee appear more alive and personable.
- Natural light is useful, but unreliable. Consider whether it is a bright or cloudy day and whether the sun is like to move or be obscured by buildings or clouds. Consistency is better than perfection.
- Be wary of relying on built-in room lighting— it is often underpowered for filming purposes, unflattering, and can cause ugly “strobe” effects on camera. Natural lighting is better than room lighting for interviews.
Audio settings
- Bad images can be fixed with good sound— no amount of beautiful imagery will fix bad audio!
- Different styles of microphone will have different requirements. Radio mics are very small and don’t need to point directly at the mouth, as they are so close to the body. “Shotgun” mics have a very narrow recording field and need to be directly and consistently pointed at an interviewee.
- Always have someone monitoring the sound from interview audio through headphones. Microphones are very responsive to certain frequencies; a distant plane can drown out an interviewee, whilst a nearby shout might barely register.
- Even the highest human voice is relatively low-pitched, sonically, so rumbles and engine noises are more “risky” than sirens or beeps.
- Monitoring audio will also allow you to register anything touching or brushing the microphone. Typical culprits are clothing, lanyards and long hair. This will sound awful and unnaturally loud.
- Ensure the microphone is not touching anything that could cause interference.
- Ensure all phones and devices are switched off or set to flight mode. Digital signals can overlap and interfere with each other, so silent mode is not enough.
- The worst mistake is to record someone too loud- so their audio “peaks” and distorts the recording. This is unfixable. If someone is too quiet you will need to artificially boost them later— digital interventions will diminish audio quality, so soundcheck properly and make sure audio is monitored. A videographer will be able to help you with this.
- If you hear an external noise during an answer, allow the interviewee to finish speaking, then check with the person monitoring audio. Don’t be afraid to ask for a repeat answer, and explain why.
Culture & Belonging resources